Monday, 23 October 2023
Markdown (and Mermaid) on Blogger in 2023
Saturday, 26 February 2022
New Toy
I just received this from the good folk at PowerPal:

This is a cool device that basically should give me real-time API-based access to the power usage of my house. The next logical step for me is to then bundle it up into my openHAB setup. I'll probably begin with just using the HTTP binding to get what I need, and maybe (and it's a BIG maybe) turn it into a genuine binding at some point in the future. My experience trying to get the Broadlink binding merged into the openHAB addons codebase has turned me off that process a little...
Sunday, 28 November 2021
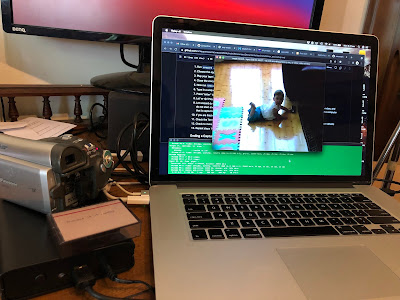
Importing/capturing digital video (DV) for FREE on a Mac in 2021
Like many others, I have a giant box of Mini DV video cassettes from 10+ years ago that I fairly-urgently need to get onto a more long-term-safe medium. As it's a pretty tedious job I have tended to do this in batches, when I can be bothered getting all the necessary bits together. Fortunately my trusty 2012 MacBook Pro has Thunderbolt ports that with just a couple of cheap adapters, can connect to the 4-pin Firewire port of my still-functional Panasonic NV-GS27 camcorder and do the job.
But while the hardware is willing, sometimes the software is not. It's all too easy to get on the upgrade treadmill and forget about applications you only use once every couple of years. In the past I used Vidi, which was minimal but $0, and thus excellent. But it won't work on 64-bit MacOS and appears unmaintained so I needed something new.
All I needed was something that could capture the raw data from each cassette and dump it into a .dv file that I can stash away on a hard drive.After a very dismaying tour through Google and YouTube made me think I'd either need to pay for a software package, or kludge something together using libdc1394 (which would be massive overkill) I finally found what I needed by searching Github directly: vrecord by AMIA Open Source.

vrecord works beautifully on my Catalina (OSX 10.15) MacBook Pro - follow the Basic Usage guide and you'll be capturing those precious memories in no time.
Sunday, 30 May 2021
Using the Velleman K8055 USB Experiment board with OpenHAB 3.x
The venerable Velleman K8055 USB Experimenter's Board is a neat way to interface a modern computer with a selection of analog and digital I/O ports. Unfortunately, support for using it within the OpenHAB home-automation framework (where it seems like a natural fit for tinkering) has fallen by the wayside - it had a proper binding in OpenHAB v1, and kinda-sorta still worked in OpenHAB v2, but it's a non-starter in 2021 with OpenHAB v3.x.
If you're running your OpenHAB (and a connected K8055) off a Raspberry Pi however, you're in luck. Simply head over to Github where some outstanding humans have done all the hard work to get your K8055 working again. It's all nicely-documented, so go ahead and give it a try. Come back here when you've got the k8055 command-line program running and making the LEDs go on and off; I'll wait.
Right. Let's get it cooking with OpenHAB, but without going through the hoops of building a new binding. Instead, we'll harness the power of OpenHAB's exec binding, and use OpenHAB's built-in state management to get persistent control of the K8055's outputs. What do I mean by that? Well, the k8055 program is completely stateless; whenever you tell it to set the digital outputs to 147 (i.e. 8, 5, 2 and 1 HIGH), it does just that, ignoring how bits 7, 6, 4 and 3 were set before - they're going to be LOW. It doesn't OR them or mask them with the current state. In fact, it can't even tell you the current state, only what it should be AFTER executing your instructions...
On your Pi, head to ${OPENHAB_CONF}, and add:
items/velleman.items
Group:Number:SUM gVellemanOutputs "Velleman output sum"
Number VellemanD1 (gVellemanOutputs)
Number VellemanD2 (gVellemanOutputs)
Number VellemanD3 (gVellemanOutputs)
Number VellemanD4 (gVellemanOutputs)
Number VellemanD5 (gVellemanOutputs)
Number VellemanD6 (gVellemanOutputs)
Number VellemanD7 (gVellemanOutputs)
Number VellemanD8 (gVellemanOutputs)

Number VellemanA1
Number VellemanA2

// Arguments to be placed for '%2$s' in command line
String VellemanOutputArgs {channel="exec:command:setoutputs:input"}
things/velleman.things
Thing exec:command:setoutputs [command="/usr/local/bin/k8055 %2$s", interval=0, autorun=true]
misc/exec.whitelist
/usr/local/bin/k8055 %2$s(In OpenHAB 3, for security, you've got to allow-list all the commands that exec can run)
Now we can add a stanza to our sitemap, to get some UI controls:
sitemaps/default.sitemap
...
Frame label="Velleman Outputs" {
  Switch item=VellemanD1 label="Digital 1" mappings=[0="OFF",1="ON"]
  Switch item=VellemanD2 label="Digital 2" mappings=[0="OFF",2="ON"]
  Switch item=VellemanD3 label="Digital 3" mappings=[0="OFF",4="ON"]
  Switch item=VellemanD4 label="Digital 4" mappings=[0="OFF",8="ON"]
  Switch item=VellemanD5 label="Digital 5" mappings=[0="OFF",16="ON"]
  Switch item=VellemanD6 label="Digital 6" mappings=[0="OFF",32="ON"]
  Switch item=VellemanD7 label="Digital 7" mappings=[0="OFF",64="ON"]
  Switch item=VellemanD8 label="Digital 8" mappings=[0="OFF",128="ON"]
  Slider item=VellemanA1 label="Analog 1" minValue=0 maxValue=255
  Slider item=VellemanA2 label="Analog 2" minValue=0 maxValue=255
}
...
This gives us all the controls for all of the outputs the Velleman K8055 supports:

Now we're ready to write a rule that ties everything together and makes it work persistently:
rules/velleman.rules
rule "Velleman Hardware Sync"
when
   Item gVellemanDigitals changed or Member of gVellemanAnalogs changed
then
  val dState = if (gVellemanDigitals.state == NULL) "" else "-d:" + gVellemanDigitals.state
  val a1State = if (VellemanA1.state == NULL) "" else "-a1:" + VellemanA1.state
  val a2State = if (VellemanA2.state == NULL) "" else "-a2:" + VellemanA2.state

    val formattedCommand = dState + " " + a1State + " " + a2State
   // logInfo("velleman.rules", formattedCommand) // Diagnostics if needed
    VellemanOutputArgs.sendCommand(formattedCommand)
end
So the neat "tricks" here I think are:
- Baking the bit-twiddling logic into each Switch - some might object to putting values like 32 or 128 directly into the sitemap. I figure, you're going to have repetitive code up here in the UI, may as well extract some value out of it if it makes the logic in the rules simpler ... and it really does
- Using the Group:Number:SUM derived group state to generate the final output byte - the other part of the solution that keeps the rule really clean - OpenHAB itself recalculates the sum of all the switch values that belong to the group gVellemanOutputs
- Using Member of gVellemanAnalogs to reduce repetition in the when clause on the analog outputs - it's only a little thing, but I like it
Thursday, 31 December 2020
Quick 2020 A-Z Wrapup
So 2020 was a thing, huh?
In between all the incredibly bad stuff, there were a few cool techy things worth remembering:
- Apple released their M1 Silicon which is ushering in a new level of performance and power-efficiency
- OpenHAB Version 3.0 has rolled out and fixed a lot of quirks and clunky behaviours, improving the WAF of this automation platform still further
- Tesla shipped its millionth electric car and became the world's most valuable carmaker
- Zeit rebranded as Vercel and continued to build Next.js as the best framework for React apps
Stay safe!
Sunday, 13 September 2020
Micro-optimisation #9725: Checkout the mainline
Very soon (October 1, 2020) Github will be making main the default branch of all new repositories instead of master. While you make the transition over to the new naming convention, it's handy to have an abstraction over the top for frequently-issued commands. For me, git checkout master is one of my faves, so much so that I've already aliased it to gcm. Which actually makes this easier - main and master start with the same letter...
Now when I issue the gcm command, it'll check if main exists, and if not, try master and remind me that this repo needs to be migrated. Here's the script
~/bin/checkout-main-or-master.sh:
#!/bin/bash

# Try main, else master and warn about outdated branch name

MAIN_BRANCH=`git branch -l | grep main`

if [[ ! -z ${MAIN_BRANCH} ]]; then
  git checkout main
else
  echo "No main branch found, using master... please fix this repo!"
  git checkout master
fi
I run it using this alias:
alias gcm='~/bin/checkout-main-or-master.sh'
So a typical execution looks like this:
mymac:foo john$ gcm
No main branch found, using master... please fix this repo!
Switched to branch 'master'
Your branch is up to date with 'origin/master'.
mymac:foo john$
Monday, 24 August 2020
Micro-optimisation #6587: Git push to Github
I've said it before; sometimes the best automations are the tiny ones that save a few knob-twirls, keystrokes or (as in this case) a drag-copy-paste, each and every day.
It's just a tiny thing, but I like it when a workflow gets streamlined. If you work on a modern Github-hosted codebase with a Pull-Request-based flow, you'll spend more than a few seconds a week looking at this kind of output, which happens the first time you try to git push to a remote that doesn't have your branch:
mymac:foo john$ git push
fatal: The current branch red-text has no upstream branch.
To push the current branch and set the remote as upstream, use

    git push --set-upstream origin red-text

mymac:foo john$ git push --set-upstream origin red-text
Counting objects: 24, done.
Delta compression using up to 8 threads.
Compressing objects: 100% (16/16), done.
Writing objects: 100% (24/24), 2.79 KiB | 953.00 KiB/s, done.
Total 24 (delta 9), reused 0 (delta 0)
remote: Resolving deltas: 100% (9/9), completed with 9 local objects.
remote:
remote: Create a pull request for 'red-text' on GitHub by visiting:
remote:      https://github.com/my-org/foo/pull/new/red-text
remote:
To https://github.com/my-org/foo.git
 * [new branch]        red-text -> red-text
Branch 'red-text' set up to track remote branch 'red-text' from 'origin'.
The desired workflow is clear and simple:
- Push and set the upstream as suggested
- Grab the suggested PR URL
- Use the Mac open command to launch a new browser window for that URL
#!/bin/bash

# Try and push, catch the suggested action if there is one:

SUGG=`git push --porcelain 2>&1 | grep "git push --set-upstream origin"`

if [[ ! -z ${SUGG} ]]; then
  echo "Doing suggested: ${SUGG}"

  URL=`${SUGG} --porcelain 2>&1 | grep remote | grep new | grep -o "https.*"`

  if [[ ! -z ${URL} ]]; then
    echo "Opening URL ${URL}"
    open $URL
  else
    echo "No PR URL found, doing nothing"
  fi
fi
I run it using this alias:
alias gpgh='~/bin/push-to-github.sh'
So a typical execution looks like this:
mymac:foo john$ gpgh
Doing suggested:     git push --set-upstream origin mybranch
Opening URL https://github.com/my-org/someproject/pull/new/mybranch
mymac:foo john$
Friday, 31 January 2020
OpenHAB Broadlink Binding situation report
After #dadlife, #newjob and #otherstuff got in the way for a while last year, I got back into my role as maintainer of the OpenHAB Broadlink device binding. My first priority was to create a binding JAR that would actually work with the newly-published OpenHAB version 2.5. As the Broadlink binding is still not part of the official OpenHAB binding repository, it doesn't "automagically" get the necessary changes applied when the upstream APIs change. Luckily, it wasn't too much work.
My priorities for 2020 for this binding remain unchanged; get it to a high-quality state, make it pass the (extremely strict) linter guidelines for OpenHAB code, and get it merged into the official codebase. For me to consider it high-quality, there are still the following tasks to do:
- Get a solid chunk of it covered by unit tests to prevent regressions; and
- Redesign the device-discovery and identification areas of the code, to make adding new devices easier
Unit Tests
Prior to OpenHAB 2.5, bindings/addons that wished to define tests had to create an entire second project that shadowed the production code and could only be run via a strange incantation to Maven which did horrible OSGi things to run integration-style tests. Essentially, OpenHAB addons were not unit-testable by conventional means. Which given most addons are developed by unpaid volunteers, naturally meant that hardly any addons had tests.
Fortunately, one of the major changes in the 2.5 architecture has been a move towards more Java-idiomatic unit testing. Finally, classic JUnit-style unit testing with Mockito mocking will be available for fast, reliable testing within the binding. I'll be shooting for at least 60% test coverage before I'll consider submitting a PR to OpenHAB.
Discovery redesign
I've been told that new versions of some popular Broadlink devices will be arriving in 2020. In anticipation of that, I want to make it much easier to add a new device. At the moment it requires defining a new subclass of BroadlinkBaseThingHandler (which is par-for-the-course for OpenHAB, being a pretty standard Java app), but also adding "magic numbers" in a number of places to assist in looking-up and identifying devices during "discovery" and also when they boot up. I want to consolidate this such that everything needed to support a device is located within one .java file - i.e. adding support for a new device will require exactly two changes in Git:
- The new .java file containing all the required information to support the new device; and
- Adding a reference to this class somewhere to "pick it up".
Thanks for all the kind words from users/testers of this binding - it's very rewarding to hear people using it with great success!
Friday, 8 June 2018
A New Old Thing; Building a retro game with React.js. Part 1 - Background and Setup
At the risk of being immodest, I'm comfortable with those concepts - Design Patterns from waaaay back and the functional paradigms from my five-year (and counting) love affair with Scala. What I wanted to explore was - what would happen if I built a React app by myself, endeavouring to write the cleanest, purest software based upon the best starting-point we currently have? How productive could I be? How long would it take to build a working full app? How would maintenance go? How quickly could I add a new feature?
As my day job is basically building CRUD apps, I wanted to do something a lot more fun for this side-project. And what could be more fun than a game? (Mental note: ask people working at Electronic Arts...) There's also a pleasing circularity in building a game and documenting how I did it - back in my earliest days of having a computer, aged about 7, I would buy magazines with program listings and laboriously enter them, line-by-line, while marvelling at how anyone could really have been good enough to know how to do this.
The Game
I'll admit, I've never built a non-trivial game before, but I think attempting an 8-bit home computer game I remember fondly from my childhood, on top of 2018's best front-end technologies, should be about the right level of difficulty.The game I'll be replicating is called Frenzy; a Micro Power publication for the BBC B, Acorn Electron and Commodore 64. My machine was the Electron - basically a low-cost little brother to the mighty Beeb; highly limited in RAM and CPU, titles for this platform usually needed substantial trimming from their BBC B donor games, despite using the same BBC BASIC language.
Check out the links above for more details and screenshots, but the game is basically a simplified version of "Qix" or "Kix" where the object is to fill in areas of the screen without being hit by one or more moving enemies.
Just for the hell of it, I'm going to place this game front-and-centre on my homepage at http://www.themillhousegroup.com, which I just nuked for this purpose. The page is now a React app being served off a Play Scala backend as per my new-era architecture, and the key technologies I'm using so far are:
- React via Create-React-App
- react-game-kit for game secret-sauce
- react-emotion for component styling
Initial Development
To develop the game, I decided to start from the start. The welcome page would need to be suitably old-skool but would force me to consider a few things:- What screen size should I be working to?
- Can I get a suitably chunky, monospaced font?
- Press Space to start sounds easy, but how do I make that actually work?
Decisions
The original Frenzy must have operated in the BBC's graphical MODE 1 because it used a whopping 4 colours and the pixels were square. So that means the native resolution was 320x256. While it would be tempting to stick to that screen size and thus have it fit on every smartphone screen, I've decided to double things and target a 640x512 effective canvas.Some searching for 8-bit fonts led me to "Press Start 2P" which, while intended to honour Namco arcade machines, is near enough to the chunky fonts I remember fondly from my childhood home computer that I can't go past it:

The final piece of the welcome screen was achieved by mounting the FrenzyGame component in a React-Game-Kit Loop and using the KeyListener to subscribe to the keys I care about - a quick perusal of the demo game showed me how to use it:
class FrenzyGame extends Component {

  constructor(props) {
    super(props);
    this.keyListener = new KeyListener();

    this.state = {
      gameOver: true
    };
  }

  componentDidMount() {
    this.loopSubscriptionId = this.context.loop.subscribe(this.update);
    this.keyListener.subscribe([
      this.keyListener.SPACE
    ]);
  }

  componentWillUnmount() {
    this.context.loop.unsubscribe(this.loopSubscriptionId);
    this.keyListener.unsubscribe();
  }

  update() {
    if (this.state.gameOver) {
      if (this.keyListener.isDown(this.keyListener.SPACE)) {
        this.setState({ gameOver: false });
      }
    }
  };

  ...

  render() {
    return this.state.gameOver
      ? this.renderWelcomeScreen()
      : this.renderGame();
  }
}
Friday, 4 May 2018
Raspberry Pi 3 Model B+
But that was before I knew about the Raspberry Pi 3, Model B+. This little rocket boots up its Raspbian (tweaked Debian) OS in a few seconds, has 1Gb of RAM and a quad-core 1.4GHz ARM processor that does a great job with the Java workloads I'm throwing at it. And look at the thing - it's about the size of a pack of cards:

With wired and wireless Ethernet, scads of USB 3.0 ports and interesting GPIO pin possibilities, this thing is ideal for my home automation projects. And priced so affordably that (should it become necessary) running a fleet of these little guys is quite plausible. If like me, you had thought the Raspberry Pi was a bit of a toy, take another look!
Saturday, 31 March 2018
Green Millhouse - Fixing the OpenHAB BroadLink Binding (part 1)
I've been building and testing locally with my A1 Air Quality Sensor, and since fixing some shared-state issues in the network layer, haven't yet experienced any of the reliability problems that plagued the original binding.
For reasons that aren't clear (because I'm working from a decompiled JAR file), the original binding was set up like this in the base Thing handler (which all Broadlink Things inherit from):
public class BroadlinkBaseThingHandler extends BaseThingHandler {
   private static DatagramSocket socket = null;
   static boolean commandRunning = false;
   ...
}
As soon as I saw those static members, alarms started ringing in my head - especially when combined with an inheritance model, you've got a definite "fragile base class" problem at compile-time, and untold misery at runtime when multiple subclasses start accessing the socket like it's their exclusive property!
An attempt to mitigate the race-conditions which must have abounded, the commandRunning boolean only complicated matters:
    public boolean sendDatagram(byte message[])
    {
        try
        {
            if(socket == null || socket.isClosed())
            {
                socket = new DatagramSocket();
                socket.setBroadcast(true);
            }
            InetAddress host = InetAddress.getByName(thingConfig.getIpAddress());
            int port = thingConfig.getPort();
            DatagramPacket sendPacket = new DatagramPacket(message, message.length, new InetSocketAddress(host, port));
            commandRunning = true;
            socket.send(sendPacket);
        }
        catch(IOException e)
        {
            logger.error("IO error for device '{}' during UDP command sending: {}", getThing().getUID(), e.getMessage());
            commandRunning = false;
            return false;
        }
        return true;
    }

    public byte[] receiveDatagram()
    {
        try {
            socket.setReuseAddress(true);
            socket.setSoTimeout(5000);
        } catch (SocketException se) {
            commandRunning = false;
            socket.close();
            return null;
        }

        if(!commandRunning) {
            logger.error("No command running - device '{}' should not be receiving at this time!", getThing().getUID());
            return null;
        }

        try
        {
            if(socket != null)
            {
                byte response[] = new byte[1024];
                DatagramPacket receivePacket = new DatagramPacket(response, response.length);
                socket.receive(receivePacket);
                response = receivePacket.getData();
                commandRunning = false;
                socket.close();
                return response;
            }
        }
        catch (SocketTimeoutException ste) {
            if(logger.isDebugEnabled()) {
                logger.debug("No further response received for device '{}'", getThing().getUID());
            }
        }

        catch(Exception e)
        {
            logger.error("IO Exception: '{}", e.getMessage());
        }

        commandRunning = false;
        return null;
    }
So we got a pseudo-semaphore that is trying to detect getting into a bad state (because of shared-state), but itself is shared-state, thereby experiencing the same unreliability.
Here's what the new code looks like:
public class BroadlinkBaseThingHandler extends BaseThingHandler {
    private DatagramSocket socket = null;
    ...

    public boolean sendDatagram(byte message[], String purpose) {
        try {
            logTrace("Sending " + purpose);
            if (socket == null || socket.isClosed()) {
                socket = new DatagramSocket();
                socket.setBroadcast(true);
                socket.setReuseAddress(true);
                socket.setSoTimeout(5000);
            }
            InetAddress host = InetAddress.getByName(thingConfig.getIpAddress());
            int port = thingConfig.getPort();
            DatagramPacket sendPacket = new DatagramPacket(message, message.length, new InetSocketAddress(host, port));
            socket.send(sendPacket);
        } catch (IOException e) {
            logger.error("IO error for device '{}' during UDP command sending: {}", getThing().getUID(), e.getMessage());
            return false;
        }
        logTrace("Sending " + purpose + " complete");
        return true;
    }

    public byte[] receiveDatagram(String purpose) {
        logTrace("Receiving " + purpose);

        try {
            if (socket == null) {
                logError("receiveDatagram " + purpose + " for socket was unexpectedly null");
            } else {
                byte response[] = new byte[1024];
                DatagramPacket receivePacket = new DatagramPacket(response, response.length);
                socket.receive(receivePacket);
                response = receivePacket.getData();
//                socket.close();
                logTrace("Receiving " + purpose + " complete (OK)");
                return response;
            }
        } catch (SocketTimeoutException ste) {
            logDebug("No further " + purpose + " response received for device");
        } catch (Exception e) {
            logger.error("While {} - IO Exception: '{}'", purpose, e.getMessage());
        }

        return null;
    }
A lot less controversial I'd say. The key changes:
- Each subclass instance (i.e. Thing) gets its own socket
- No need to track commandRunning - an instance owns its socket outright
- The socket gets configured just once, instead of being reconfigured between Tx- and Rx-time
- Improved diagnostic logging that always outputs the ThingID, and the purpose of the call
The next phase is now stress-testing the binding with a second heterogeneous device (sadly I don't have another A1, that would be great for further tests), my RM3 Mini IR-blaster. I'll be trying adding and removing the devices at various times, seeing if I can trip the binding up. The final step will be making sure the Thing discovery process (which is the main reason to upgrade to OpenHAB 2, and is brilliant) is as good as it can be. After that, I'll be tidying up the code to meet the OpenHAB guidelines and hopefully getting this thing into the official release!
Sunday, 25 February 2018
Green Millhouse - Temp Monitoring 2 - Return of the BroadLink A1 Sensor!
Here's the relevant OpenHAB forum post - it includes a link to a Beta-quality OpenHAB binding, which I duly installed to my Synology's OpenHAB 2 setup, and it showed itself to be pretty darn good. Both my A1 and my new BroadLink RM3 Mini (wifi-controlled remote blaster) were discovered immediately and worked great "out of the box".
However, I discovered that after an OpenHAB reboot (my Synology turns itself off each night and restarts each morning to save power) the BroadLink devices didn't come back online properly; it was also unreliable at polling multiple devices, and there were other niggly little issues identified by other forum members in the above thread. Worst of all, the original developer of the binding (one Cato Sognen) has since gone missing from the discussion, with no source code published anywhere!
Long story short, I've decided to take over the development of this binding - 90% of the work has been done, and thanks to the amazing JAD Decompiler, I was able to recover the vast majority of the source as if I'd written it myself. At the time of writing I am able to compile the binding and believe I have fixed the multiple-device problems (the code was using one shared static Socket instance and a shared mutable Boolean to try and control access to it...) and am looking at the bootup problems. And best of all, I'm doing the whole thing "in the open" over on Github - everyone is welcome to scrutinise and hopefully improve this binding, with a view to getting it included in the next official OpenHAB release.
Saturday, 8 July 2017
The CRAP Stack, Part 3 - Front-End Routes with a Play server
http://myapp.com/foo/barwhere there is no explicit entry for GET /foo/bar in Play's routes and nor is there a physical asset located in /public/foo/bar for the Assets controller to return to the client, as we set up in the last instalment:
  # Last of all, fall through to the React app
  GET /       controllers.Assets.at(path="/public",file="index.html")
  GET /*file  controllers.Assets.at(path="/public",file)
What we'd like is for the React application at index.html to be served up, so that it can then consume/inspect/route from the original URL via the Window.location API.
As it stands, the last line of routes will match, the Assets controller will fail to find the resource, and your configured "client error handler" will be called to deal with the 404. This is not what we want for a "front-end route"!
We want requests that don't correspond to a physical asset to be considered a request for a virtual asset - and hence given to the React app. And after a bit of fiddling around, I've come up with a FrontEndServingController that gives me the most efficient possible way of dealing with this. The Gist is available for your copy-paste-and-improve pleasure, but the key points are:
The fall-through cases at the bottom of routes become:
  GET /       controllers.FrontEndServingController.index
  GET /*file  controllers.FrontEndServingController.frontEndPath(file)
Those methods in FrontEndServingController just being:
  val index = serve(indexFile)

  def frontEndPath(path: String) = serve(path)

  private def serve(path: String) = {
    if (physicalAssets.contains(path)) {
      logger.debug(s"Serving physical resource: '$path'")
      assets.at(publicDirectory, path, true)
    } else {
      logger.debug(s"Serving virtual resource: '$path'")
      // It's some kind of "virtual resource" -
      // a front-end "route" most likely
      assets.at(publicDirectory, indexFile, true)
    }
  }
We're still using Play's excellent built-in AssetsController to do the hard work of caching, ETags, GZipping (all the classic webserver jobs) - we have injected it as assets using Dependency Injection - composition FTW. That true argument tells it to use "aggressive caching" which is ideal for this scenario where the bundle files we're serving up already have a cache-busting filename.
And now the "clever" bit being a recursive scan of the /public directory when we start up, assembling a definitive (and immutable!) Set[String] of what's actually a physical asset path:
  lazy val physicalAssets:Set[String] = {
    val startingDirectory = new File(physicalPublicDirectory)
    deepList(startingDirectory)
  }

  private def deepList(f: File): Set[String] = {
    val these = f.listFiles.toSet
    val inHere = these.filter(_.isFile).map { f =>
      f.getPath.replace(physicalPublicDirectory, "")
    }
    val belowHere = these.filter(_.isDirectory).flatMap(deepList)
    inHere ++ belowHere
  }
Tuesday, 29 November 2016
Green Millhouse - Temp Monitoring 1 - Hacking the BroadLink A1 Sensor

These devices, like those before them, have dubious reputations for "phoning home" to random Chinese clouds and being difficult and unreliable to set up. I can confirm!
The first problem is easily nipped in the bud with some judicious network configuration, as I outlined last time. The device works just as well when isolated from the outside world, so there is nothing to fear there.
The second problem is real. Luckily, it's as if they know the default device-finding process will fail (which it did for me the half-dozen times I tried), and they actually support and document an alternative scheme ("AP Mode") which works just fine. Just one thing though - this device seems to have NO persisted storage of its network settings (!) which probably means you'll be going through the setup process a few times - you lose power, you lose the device. Oy.
So once I had the sensor working with its (actually quite decent) Android app, it was time to start protocol-sniffing, as there is no existing binding for this device in OpenHAB. It quickly became apparent that this would be a tough job. The app appeared to use multicast IP to address its devices, and a binary protocol over UDP for data exchange.
Luckily, after a bit more probing with WireShark and PacketSender, the multicast element proved to be a non-event - seems like the app broadcasts (i.e. to 255.255.255.255) and multicasts the same discovery packet in either case. My tests showed no response to the multicast request on my network, so I ignored it.
Someone did some hacks around the Android C library (linked from an online discussion about BroadLink devices) but all my packet captures showed that encryption is being employed (for reasons unknown) and inspection confirms encryption is performed in a closed-source C library that I have no desire to drill into any further.
A shame. The BroadLink A1 sensor is a dead-end for me, because of their closed philosophy. I would have happily purchased a number of these devices if they used an open protocol, and would have published libraries and/or bindings for OpenHAB etc, which in turn encourages others to purchase this sort of device.
UPDATE - FEB 2018: The Broadlink proprietary encrypted communication protocol has been cracked! OpenHAB + Broadlink = viable!
Friday, 26 February 2016
Making better software with Github
This solved my problem, in that I no longer ran out of PermGen on my build slave. But the repercussions were far-reaching. Any decent public-facing library needs documentation, and Github's README.md is an incredibly convenient place to put it all. I've lost count of the number of times I've found myself reading my own documentation up there on Github; if Arallon was still a hodge-podge of classes within my application, I'd have spent hours trying to deduce my own functionality ...
Of course, a decent open-source library must also have excellent tests and test coverage. Splitting Arallon into its own library gave the tests a new-found focus and similarly the test coverage (measured with JaCoCo) was much more significant.
Since that first library split, I've peeled off many other utility libraries from private projects; almost always things to make Play2 app development a little quicker and/or easier:
- play2-reactivemongo-mocks - Mocking out a ReactiveMongo persistence layer
- play2-mailgun - Easily send email via MailGun's API
- pac4j-underarmour - Integrates UnderArmour (aka MapMyRun) into the pac4j authentication framework
- mondrian - A super-simple CRUD layer for Play + ReactiveMongo
As a shameless plug, I use yet another of my own projects (I love my own dogfood!), sbt-skeleton to set up a brand new SBT project with tons of useful defaults like dependencies, repository locations, plugins etc as well as a skeleton directory structure. This helps make the decision to extract a library a no-brainer; I can have a library up-and-building, from scratch, in minutes. This includes having it build and publish to BinTray, which is simply just a matter of cloning an existing Jenkins job and changing the name of the source Github repo.
I've found the implied peer-pressure of having code "out there" for public scrutiny has a strong positive effect on my overall software quality. I'm sure I'm not the only one. I highly recommend going through the process of extracting something re-usable from private code and open-sourcing it into a library you are prepared to stand behind. It will make you a better software developer in many ways.
* This is not a criticism of OpenShift; I love them and would gladly pay them money if they would only take my puny Australian dollars :-(